
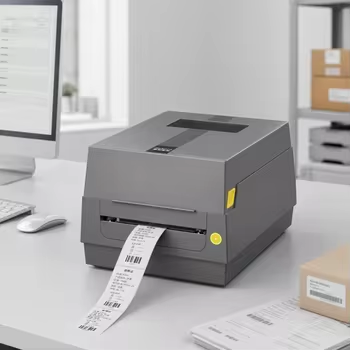

Setting up a label printer for the first time does not have to feel complicated. Once you load the media, connect the printer, install the necessary software, and adjust the basic settings, you can usually start printing within a few minutes.
Before you begin, make sure you have your Xprinter label printer, compatible labels, power cable, connection cable, and access to the computer or device you plan to use. The exact setup process can vary by model, so keep the printer’s manual nearby as you work through the initial configuration.
Check Everything Before Setup
Start by unpacking the printer and checking that all required components came with it. Remove any protective packaging from the printer and make sure there are no loose pieces inside the media compartment.
You should have:
- The printer
- Power adapter and cable
- USB or other supported connection cable
- Compatible label roll
- Installation or driver software, when required
- User documentation
Do not connect everything immediately. Taking a minute to identify each component can prevent mistakes during installation.
Place the Printer in a Suitable Location
Put the printer on a stable, flat surface with enough space around it. You need room to open the media compartment and replace label rolls later.
Keep the printer away from excessive moisture, direct heat, and dusty areas. A clean working environment can also help prevent debris from affecting the print head or label path.
Load the Label Roll
The next step involves placing the label roll inside the printer.
Open the printer cover and locate the media holder. Position the roll according to the direction shown in the printer’s instructions, then guide the label material through the designated path.
Make sure the labels sit straight and do not pull heavily toward one side. Misaligned media can lead to crooked printing or feeding problems.
Close the cover securely once the roll sits correctly.
Connect the Printer to Power
Connect the power adapter to the printer and then plug it into an appropriate electrical outlet.
Turn the printer on and check its indicator lights or display, depending on the model. Give the printer a moment to initialize before connecting it to your computer.
If the printer does not power on, check the power connections before continuing with the software setup.
Connect It to Your Computer
Most desktop label printers connect through USB, while some models may support additional connection methods.
Connect the appropriate cable between the printer and your computer. Your operating system may recognize the device automatically, but some models require a specific driver before the computer can communicate with the printer correctly.
Avoid repeatedly unplugging and reconnecting the printer during driver installation unless the setup instructions specifically request it.
Install the Correct Driver
A printer driver allows your computer to communicate with the hardware. Without the correct driver, the printer may appear connected but still fail to print properly.
Download or install the driver that matches your specific printer model and operating system. Using a driver intended for another model can cause printing or configuration problems.
Follow the installation instructions and restart the computer if the software requests it.
Configure the Printer Settings
Once the driver has installed, open your computer’s printer settings and select the newly installed device.
Check the basic options, especially:
- Paper or label size
- Print orientation
- Print density or darkness
- Print speed
- Media type
- Print width
The available settings vary by model. Do not select a random paper size simply because it looks close to your label dimensions.
Calibrate the Labels
Calibration helps the printer understand where one label ends and the next begins.
The exact calibration process depends on the printer and its sensor system. Some printers may perform calibration through a button sequence, while others use printer software or a configuration utility.
If labels advance too far, stop in the wrong position, or print across multiple labels, calibration should be one of the first things you check.
Print a Test Label
After configuring the printer, print a small test label rather than immediately starting a large batch.
Look at the result carefully. Check whether:
- The text sits in the correct position.
- The barcode appears complete.
- The label feeds correctly.
- The content fits within the printable area.
- The printer produces clear, consistent output.
A test print gives you an opportunity to correct settings before wasting a full roll of labels.
Adjust Print Quality
If the test label looks too light, too dark, blurry, or uneven, check the printer settings and label material.
Increasing print darkness does not always solve poor-quality output. Excessive heat can sometimes create unwanted effects, while an unsuitable label surface may prevent clean printing.
Try small adjustments and print another test label after each significant change.
Common First-Time Setup Problems
New users often encounter a few simple issues during their first setup.
Labels Feed Incorrectly
Check that the roll sits correctly in the holder and that the media passes through the correct path. Calibration may also help the printer detect the label gaps correctly.
Printer Appears Offline
Check the USB or network connection first. Then confirm that the correct printer appears as the default or selected device in your computer’s printer settings.
Printing Starts in the Wrong Position
Incorrect label dimensions or sensor calibration often cause this problem. Verify the label size in the driver and run the appropriate calibration procedure.
Print Looks Faded
Check the print darkness, speed, and label material. A worn or dirty print head can also affect print quality.
Also, explore How to Set Up an Xprinter Label Printer for the First Time
Keep the Printer Ready for Regular Use
Once the initial setup works, keep the printer’s settings documented. Knowing the correct label dimensions and preferred print settings makes future media changes much easier.
Clean the printer according to the manufacturer’s maintenance instructions and replace labels before the roll completely runs out. Regular care can help maintain consistent printing performance.
Final Thoughts
Setting up a label printer for the first time mainly involves four things: loading the correct media, installing the right driver, configuring the label settings, and checking the result with a test print.
Take your time with calibration and label sizing during the first setup. Getting these basics right can prevent many of the feeding and alignment problems that new users commonly encounter.

